Last Updated on October 8, 2025 by ReTurf
If your yard is a little less than perfectly flat, you’re definitely not alone. Most outdoor spaces have at least some dips, slopes, or uneven spots—nature isn’t exactly in the business of making sure everything is level. But that doesn’t mean artificial turf won’t work. In fact, a well-installed turf job can smooth out inconsistencies and make an awkward landscape feel more intentional. It’s just that, compared to a relatively “even” backyard, installing artificial grass on non-level ground takes a little more planning.
The good news? Synthetic turf is actually pretty forgiving. If you do it right, it can work just as well—if not better—on uneven terrain as it does on a flat surface. It can help prevent erosion, eliminate the headaches of mowing weird inclines, and give you a clean, polished look even in areas where natural grass would struggle. But you’ve got to take the time to prep correctly. Lay it down on a poorly prepped surface, and you’ll end up with wrinkles, shifting, or lifting edges before you know it. And once that happens, it’s a whole lot harder to fix than it would have been to just do it right the first time.
So, what’s the game plan? Whether you’re working with a sloped yard, some unexpected low spots, or an overall bumpy surface, the key is securing the turf properly and making sure your base is solid. That means compacting the ground, reinforcing edges, and taking a few extra steps to prevent ripples or movement over time. (It’s not exactly rocket science, but it is one of those things where cutting corners will come back to haunt you.)
Let’s take a closer look at how to get artificial grass to work on uneven ground, what to do about slopes and hills, and how to make sure your installation stays put for years to come.
Can Artificial Turf Be Used Effectively on Slopes or Hills, and How Should It Be Secured?
Yes, artificial turf can absolutely be installed on slopes and hills. In fact, it can be a great solution for erosion control and keeping steep areas low-maintenance.
If you’ve got a yard with steep inclines, you already know that natural grass can be a pain to maintain. Mowing a hill is awkward at best, and dangerous at worst, especially if it’s a steep grade where a mower can slip, or the soil is so loose that you’re just kicking up dirt with every pass.
Then there’s the erosion—every time it rains, you watch half your topsoil wash down to the bottom of the hill. Synthetic grass? Well, it doesn’t need mowing, and if it’s installed correctly, it’s not going anywhere, even in a heavy storm.

That said, compared to flat surfaces, sloped installations do require a little extra planning and reinforcement to keep the turf from slipping, sagging, or bunching up over time. Especially if the area sees a lot of foot traffic—kids running up and down, pets tearing through, or even just the occasional use—you’ll want to take extra steps to make sure the turf stays put. Done right, artificial turf on a slope can look fantastic and stay that way for years, but it’s all about laying the groundwork (literally) before you ever roll out that first piece.
Main Challenges of Turf on Slopes
- Gravity wants to pull the turf down – Over time, artificial turf can creep downhill if it’s not anchored properly.
- Water runoff can cause erosion underneath – Poorly compacted base material can wash away, creating weak spots.
- Foot traffic adds stress – If the area sees a lot of use, especially on a steeper incline, turf can shift more easily.
Best Ways to Secure Artificial Turf on Slopes
- Use a Stronger Base Layer – Instead of just a compacted sub-base of crushed rock or decomposed granite, consider adding a layer of geotextile fabric to help stabilize the ground and prevent erosion.
- Increase the Number of Turf Nails or Stakes – On flat ground, you might use nails every 6–12 inches along the edges. On a slope, you’ll want to drive nails or U-shaped staples every 4–6 inches along the perimeter and throughout the surface to keep the turf from shifting.
- Use Adhesive for Extra Hold – In areas where nails alone might not be enough, using a landscape-grade turf adhesive on the base can provide extra security. This is especially useful for steeper slopes.
- Install Turf in Sections (Instead of One Large Piece) – Large rolls of turf can be harder to secure properly on hills. Cutting turf into more manageable sections and seaming them together with strong adhesive or seam tape can help distribute weight better and reduce shifting.
- Stretch the Turf Tightly Before Securing – One of the biggest issues on slopes is wrinkling. Pull the turf tight and use stakes or nails at the top of the slope first, working your way down to ensure a smooth, snug fit.
When installed correctly, artificial turf can handle slopes just fine. Just don’t cut corners on the securing methods, or you’ll end up fixing slippage and bunching down the road.
What Are the Best Methods for Securing Artificial Turf Edges to Prevent Curling or Lifting Over Time?
When dealing with uneven ground, one of the first trouble spots tends to be the edges. If the perimeter isn’t properly secured, you’ll start seeing edges lifting up, which can lead to tripping hazards, water getting under the turf, and an overall worn-out look.

Now let’s talk about edges for a second. They might not seem like the most exciting part of an artificial turf install, but they’re where a lot of projects start to show wear over time—especially if the ground isn’t perfectly level. (If you’ve ever seen a piece of old turf or fake grass with the edges curling up or looking a little rough around the perimeter, you know exactly what I’m talking about.) And once those edges start lifting, things can go downhill fast—no pun intended.
Now, this isn’t something that happens overnight. It’s more of a slow creep, the kind of thing you might not even notice at first. Maybe a little lifting in one corner, then a bit more along the side, and before you know it, the whole perimeter is looking wavy. Not only does that take away from the clean, professional look you were going for, but it can also create some practical issues. Tripping hazards? Check. Water sneaking underneath the turf where it shouldn’t be? Yep.
And if left unchecked, lifted edges can make the whole installation more vulnerable to shifting, especially in spots where people tend to walk or where the ground naturally settles over time.
The good news is, securing the edges of turf properly isn’t difficult—it just takes a little extra care upfront. And once you do it right, you’re set. No loose spots, no curling, just a crisp, finished look that stays put for the long haul.
So, how do you keep those edges locked down and looking good? We’ll go over the best methods, from using nails and perimeter boards to adding adhesive and infill, to make sure your turf installation stays just as secure on day 500 as it was on day one.
What Causes Turf Edges to Lift in the First Place?
- Shifting soil underneath – If the base isn’t well compacted, the ground can settle and create gaps under the turf.
- Temperature fluctuations – Turf expands and contracts slightly with heat and cold, which can cause edges to pull away over time.
- Foot traffic & use – Edges that see a lot of activity are more likely to start peeling up if they weren’t secured properly.
Best Edge Securing Methods
- Nail Down the Edges Tightly – Just like with slopes, you’ll want to use turf nails or staples every 4–6 inches along the edges to prevent movement.
- Use a Perimeter Board for Extra Stability – A buried plastic or treated wood bender board creates a defined edge that prevents the turf from shifting, especially in areas with softer ground.
- Apply Turf Glue or Adhesive Along the Perimeter – This adds an extra layer of security and prevents lifting due to weather changes or foot traffic.
- Sand Infill Helps Keep Everything in Place – Spreading and brushing in a layer of infill (like silica sand) adds weight and helps hold the turf down, reducing edge curling over time.
- Tuck Edges Underneath for a Cleaner Look – If possible, tuck the edges of the turf underneath itself or into the surrounding hardscape (like edging pavers) to give it a natural, seamless appearance.
Properly secured edges make all the difference in keeping artificial turf looking neat and staying in place, even on uneven ground.
What’s the Best Way to Prevent Artificial Turf from Developing Wrinkles or Ripples Over Time?

One of the biggest concerns when installing artificial turf on uneven ground is the risk of wrinkles and ripples forming. Not only do they look bad, but they can create tripping hazards and lead to premature wear.
Causes of Wrinkles in Artificial Turf
- Improperly compacted base – If the base material shifts or settles unevenly, the turf won’t stay smooth.
- Not stretching the turf during installation – Turf needs to be pulled tight before securing it to prevent future wrinkling.
- Temperature changes – Turf expands in heat and contracts in cold, which can cause buckling if not installed properly.
- Not enough securing points – Loose areas are more prone to bunching up over time.
How to Prevent Wrinkles and Ripples
- Start with a Well-Compacted Base – Use a plate compactor to compact the crushed rock base thoroughly. Aim for at least 3–4 inches of well-packed base material.
- Let the Turf Acclimate Before Installation – Roll out the turf and let it sit in the sun for a few hours before installing. This allows it to expand fully, so it won’t stretch and wrinkle later.
- Stretch the Turf Tightly as You Secure It – Work from one side to the other, pulling the turf snug and anchoring it in place as you go.
- Use More Nails or Staples in Problem Areas – If you’re installing on uneven terrain, adding extra securing points prevents movement that can lead to wrinkles.
- Brush and Add Infill Properly – Brushing the turf fibers upright and spreading infill evenly across the surface helps keep the turf from shifting and developing ripples over time.
A smooth, wrinkle-free install starts with good prep and a little patience—rushing through the process is a surefire way to end up with bunched-up turf that needs fixing later.
Making Artificial Turf Look Natural on Hills & Slopes

One of the biggest misconceptions about artificial turf—especially when it’s installed on slopes or uneven ground—is that it’s going to look “fake,” like bright green turf draped over a hill. And sure, if it’s not installed with care, you might end up with something that doesn’t quite blend in. But when done right, artificial turf can look just as natural as a well-maintained grass lawn—without the hassle of constant upkeep.
The trick to making turf look realistic on hills comes down to a few key details. First, fiber direction. Turf has a grain, meaning the blades naturally lean in one direction. On flat ground, it’s easy to control how it lays, but on a slope, you have to be mindful of how it catches the light. If the entire hill is covered in turf laid in the same direction, it can create an unnatural uniformity. A slight variation in seam placement—or even intentionally adjusting the direction in different sections—can break up that “too-perfect” look and make it feel more organic.
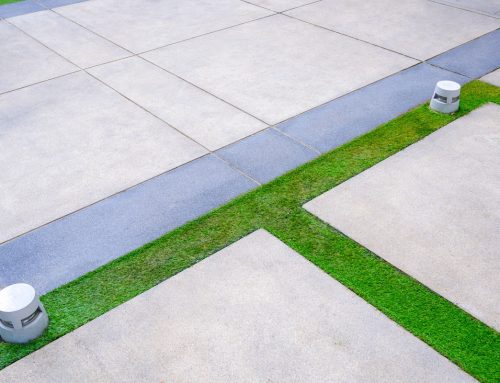
See in the photo below how the uneven ground actually helps the artificial turf look even more realistic:

Another big factor is blending infill and textures. Natural grass isn’t just one flat shade of green—it has depth, variation, and a little movement. Using a mix of infill types, like silica sand or a thatch layer, helps create a more natural appearance. Some higher-end turf products even come with multi-tone fibers that mimic the color variation you’d see in real grass, which can make a huge difference in how realistic it looks, especially in direct sunlight.
Also, edges and transitions—this is where artificial turf can either shine or stick out. If you’re installing it on a hill that blends into natural landscaping, like trees, flower beds, or rock features, just take the time to integrate those transitions smoothly. Instead of cutting the turf in a straight, obvious line, curving the edges to follow the natural flow of the terrain makes it look like it belongs there.
An important note here is that uneven ground can actually make artificial turf look more realistic—when installed correctly. That’s because real grass isn’t perfectly flat. It has natural undulations, subtle dips, and variations in height that catch the light differently throughout the day.
A perfectly level, ultra-smooth artificial lawn can sometimes look too pristine, almost like a putting green, which isn’t always what people want in a residential or natural landscape setting.
When artificial turf is installed on slightly uneven terrain—or even just given a little intentional contouring—it can add depth and realism to the overall look. The trick is to work with the natural shape of the land rather than fighting against it. Instead of flattening every minor bump, installers can subtly shape the base to create a more organic feel.

That said, there’s a balance—you don’t want exaggerated bumps or ripples that make the surface look unnatural or cause functional issues. Wrinkles, for example, aren’t the kind of “natural unevenness” that helps; they just make the turf look poorly installed. The key is ensuring the base is well-compacted and smoothly contoured so the turf conforms seamlessly to the ground without shifting or creating air pockets over time.
So, in short: a little natural variation in the terrain? Great for realism. Poorly prepped, bumpy, or wrinkled turf? Not so much. When done right, a gently rolling lawn or a softly sloped hillside covered in artificial grass can look just as natural—if not more so—than a perfectly flat install.
At the end of the day, artificial turf doesn’t have to look artificial—especially on uneven ground. It’s all about thoughtful installation, blending elements the way nature does, and using the right materials to create something that looks natural, even if it’s built to last far longer than the real thing.
Final Thoughts

Artificial turf can absolutely work on uneven ground, but like anything worth doing, it pays to do it right the first time. If you take a little extra care up front—really secure those slopes, fasten the edges properly, and make sure your base is solid—you’re setting yourself up for years of a good-looking, low-maintenance yard.
Now, I won’t sugarcoat it: installing turf on a non-level surface does take a bit more effort than rolling it out on a perfectly flat lawn. But it’s not overly complicated, and it’s definitely not more trouble than it’s worth.
Think of it like laying a good foundation for a house. You don’t see it once everything’s finished, but it makes all the difference in how well things hold up. Just take the time to get that base right, secure the edges properly, and stretch the turf tight, and you won’t have to worry about shifting, wrinkles, or loose spots down the road.
And once it’s in? That’s the beauty of high-quality, professionally-installed artificial turf—it just stays put. No mowing weird slopes, no dealing with weeds or bare patches where natural grass refuses to grow, no poor soil drainage or mud washing down the hill every time it rains. Whether you’re covering a tricky hillside, leveling out an uneven yard, or just making things look cleaner and more polished, artificial turf is one of those investments where you’ll be glad you did it right.
So take your time with the prep, secure everything the way it needs to be, and enjoy having a yard that looks great without the hassle. Because when it’s done right, you won’t be thinking about all the work that went into it—you’ll just be enjoying the results.