Last Updated on June 21, 2024 by ReTurf
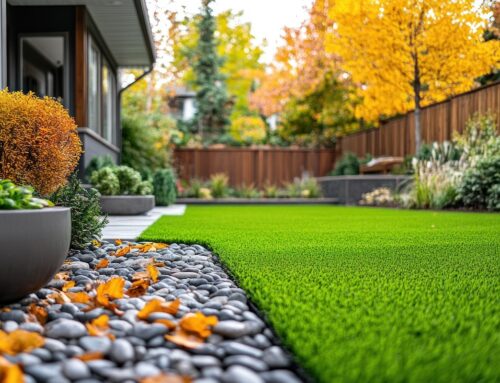
Installing Artificial Turf Outdoors
Artificial turf makes for a great DIY backyard project. From play to workout areas, quality used turf plays a role in both positive environmental impacts and the reduction of maintenance. To keep your project cost-effective, self-installation is an option you should consider. To make the best judgment call, we will outline the basic process in this article. This should help you decide between installing artificial turf yourself or professional installation.

Step 1: Site Evaluation
Getting to know the ins and outs of your spot will provide both safeties and help protect your project area from standing water issues.
Check For Underground Hazards
Most importantly, check for utility hazards. These include underground power lines and cables as well as underground water lines. Usually, your local utilities will provide some site evaluation services to check for these. Some contractors also have this ability. In any case, coming in contact with underground utilities can be deadly and this part should be treated with care.
Plan For Drainage
Standing water can become very annoying in your new custom-built outdoor area. Artificial turf in itself drains very efficiently, but this water needs a place to go to keep it from pooling on top. Verifying you have either well-draining soil or that you have the depth available to install a drainage layer (described later in the next section of this article). Things to consider for the installation of the drainage layer include the removal of large roots and rocks located in the area that you will be installing the artificial turf. You may need to plan for the removal of these before going much further with your project.
Step 2: Ground Prep
This is where the work and fun begin with your outdoor turf project! As with anything, preparation is key. These next steps will ensure ease of final installation and the long-term enjoyment of your project.
Mark The Area
You’ll want to outline the area in which you will be installing the artificial turf. This will allow you to fully prepare the area while making sure the entire surface is ready for your final installation.
Remove Vegetation
Inside of your outlined area, begin removing surface vegetation and small roots. You will want to keep any vegetation from sprouting up through the turf over time. Remove all weeds and grasses from the surface in this step.
Remove Soil Layer
You will need to remove a soil layer to have the depth required for your drainage layers (if needed) and base fill. In any case, you will want to make sure you have enough depth to level the surface and have the artificial grass sit at the right height in relation to the surrounding grounds.
Drainage
If you have compacted or poorly draining soil you will want to install a drainage layer and/or system. For a drainage layer, you have choices between rock fill drainage at an additional depth of around 6 inches or purchasing a synthetic drainage layer. The thicknesses of these artificial turf drainage solutions can vary and may require additional steps.
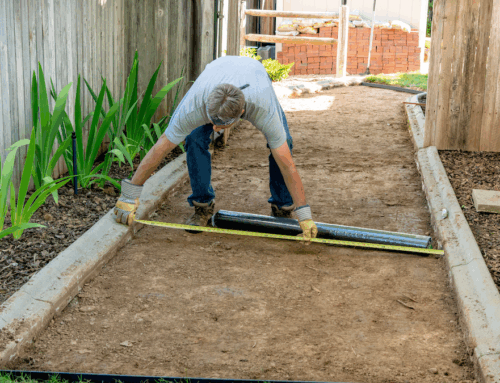
When installing your border (see the next section) and you feel you will have a drainage issue, allowing a place for water to drain off the surface through the border is important. A drainage gap in the border every 6 inches or so will be the most efficient (as in the image at the top of this article).
Border Your Turf
Before filling your area back in, you’ll now want to install your final border product (see the image at the top of this article). This border shown is a “bender board”. Bender Board is readily available in large rolls at your local home improvement store, usually in the garden area.
Step 3: Base Layer
Now we begin the process of building back up. This layer will provide the support, drainage, and levelness of your outdoor artificial turf project.
Install Main Base Material
Before installing your base layer, you can install a weed barrier and gopher wire if desired. This will help block future vegetation and underground rodents from trying to pop up through your turf floor.
The base material is a rock with a size of less than 3/8 of an inch in size. The minimum depth of this layer should be 3-4 inches, and if you have bad drainage issues 6 inches would be recommended. This can be shoveled in by hand or dumped with a wheelbarrow. In both cases, evenly spread this fill layer across the entire area.
Add Sand Layer
Once the base rock layer is finalized you will want to add sand. The sand to be added at this point should be a course variety. Known as Sharp Sand, River Sand, or Builders Sand, this layer provides support and a final leveling surface for your artificial turf layer. The depth of sand is usually about 3/4 of an inch above the rock layer.
Water Down
After the sand layer is spread at the desired thickness, watering it down is the next step. This helps compact your sand layer and later level it. But do make sure not to use so much water or too much water pressure that it causes you to lose sand. Just wet it enough to get a firm wet layer established.
Compact And Level The Area
You’ll want to tamp the surface down to give it its final firmness. This can be done with either a plate tamper or plate compactor. After the first wave of compacting check for level across the surface. You will want to rake down high spots or add more sand to low spots. After each check, compact the area again. Keep going until the final, perfected, surface is completed.
Step 4: Installing The Artificial Turf
You’ll finally begin to see your vision take shape, but this final process involves more work to be performed. You have perfected the prep work up to this point, and these final steps will ensure a great looking and long-lasting artificial turf project.
Plan Placing And Cuts
As bad as you probably wanted to layout your artificial turf first just to see what it would look like, the fact is that the preparation steps may change the final layout and its nuances. It is important to wait until now to make sure you haven’t made any cuts that cannot be fit into your final area.
Roll-Out
Do not drag your turf over the prepped surface area during any step. Place it down from above while holding the edges and gently shake out any air trapped beneath so it sits perfectly level.
To begin, roll out your first section along one edge. You’ll want all of your artificial grass blades pointing in the same direction, keep the desired final direction of grass blades in mind when rolling out your section. Once this first piece is rolled out, you’ll want to mark where it lays on your base layer material, spray paint is usually what is used (just the base layer not the turf itself). This will later provide a map for where the pieces will be placed. On the edges that contact the borders, mark these cuts on your artificial turf itself. Chalk is a good choice for this as it can be washed off. You’ll want to add 1″ to these edges to make up for any miscalculation during the cut.
Remove this section and transport it to a level surface. Here is where you will make the cut. Take the piece back to the surface and place. Take your next section and repeat the process to lay in the second piece. These pieces should mate so there is no visible gap. Repeat this process until you have your area covered.
You’ll also want to stretch the turf and verify each edge mates perfectly during this part of the process.
Seam The Pieces
Cut your seam tape to the length of the seam to be glued. Roll up the edge of each strip where they meet. Lay your glued seam tape under the turf, center of the mating edges. Starting from one end, working section by section down the length of the seam, place the turf back down and use 6-inch nails to temporarily hold the pieces in place at their corners. Apply pressure or weights along the seamed edge while the seam tape cures. Repeat this process between each seam.
Staple In Place
Once all of the seams have set you can remove the 6-inch nails and begin stapling the turf down. To do this, use 6-inch galvanized U-shaped garden pins. These should be placed around the edges as well as along each seam.
Step 5: Final Steps
Now we’ll make the final touches to your almost completed project
Trimming
With the pieces laid out in their final resting place, inspect edges for any unwanted portions of turf. You can use a utility knife to trim down any excesses you may encounter.
Install The Infill
Infill is an important layer for the natural look and feel of your artificial grass surface. Verifying that it is completely dry, brush back the turfgrass blades against the way they naturally lay to stand them up as vertically as possible. Using a shovel or sand spreader begin to apply your infill while walking backward in relation to the blade direction. After applying this level evenly across the entire surface, brush or broom the turfgrass until the infill layer sinks completely below the grass.
Check for highs and lows and broom down or add infill as needed. Once satisfied, water the turf. Water as if you were watering a regular lawn. Let it dry overnight. Check your surface and make sure you like the outcome. If you see any further infill needs perform them now and repeat the watering drying process until satisfied.
That’s the process, your project is complete at this point (aside from decorations and victory barbeques).